
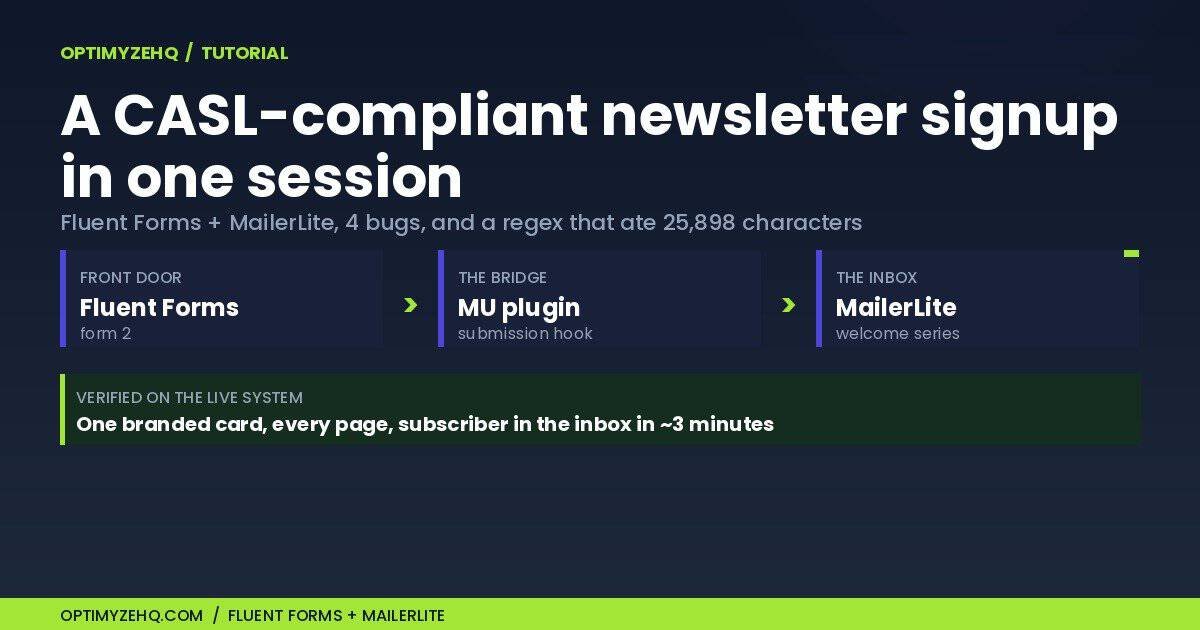
How I shipped a CASL-compliant newsletter signup in one session: Fluent Forms, MailerLite, and a regex that ate 25,898 characters
A regex I ran yesterday afternoon deleted 25,898 characters from a live page on this site in one keystroke. Three unrelated content blocks, gone. The page that almost got wiped was my Free AI Starter Kit landing page. I was running a find-and-replace to strip out the old MailerLite iframe block so I could drop in the new signup, and my regex matched far more than the block I was aiming at.
I got it back. I also finished what I set out to do: a CASL-compliant newsletter signup that runs the same Fluent Forms MailerLite integration on every page of the site, behind one branded card I can edit in a single place. This is the full account of what I built, the four things that broke along the way, and the parts you can copy. No theory. Everything here is from one build session, verified against the live system as I wrote it.
Why I tore out a signup that already worked
I already had email capture running. MailerLite gives you an embedded form, you paste an iframe, and you’re collecting addresses in ten minutes. It worked. I left it alone for two weeks.
The problem wasn’t that it failed. The problem was that it looked like someone else’s product bolted onto mine. The iframe carried MailerLite’s spacing, MailerLite’s input styling, and a font that wasn’t my font. On a dark navy section it sat in a white rectangle like a sticker. And because every placement was a separate paste, changing the headline meant editing the form in six places and hoping I caught them all.
So I gave myself two paths. Path A: keep the iframe, accept the look, move on. Path B: build the signup natively in WordPress, own the markup and the styling, and route subscribers into MailerLite myself.
I picked Path B for three reasons. Brand control, so the signup matches the navy-to-slate card the rest of the site uses. Data ownership, so the form lives in my database and I’m not dependent on an iframe rendering correctly. And consent, which matters more for me than for most people writing these tutorials, because I run this business from Quebec and CASL is not the same law as the American one. More on that in Lesson 5. The short version: I wanted the consent language to be mine, visible, and honest, not buried in a third-party widget.
The goal I wrote down before touching anything: the same signup card everywhere on the site, transparent monthly-newsletter language, one place to edit it, and a subscriber who lands in MailerLite and gets the Starter Kit within minutes.
The stack
Here’s everything involved, and which job each piece does:
- WordPress + Kadence theme + Kadence Blocks Pro. The site and the block editor. Kadence handles the page layout; the signup is a reusable block I drop wherever I need it.
- Fluent Forms (core 6.2.4, Pro 6.2.3). The form builder. Form ID 2, “Newsletter OptimyzeHQ Monthly,” with four fields: a hidden
sourceinput, an email field, a consent checkbox, and the submit button. This is the front door. - A custom MU plugin (
optimyzehq-fluentform-mailerlite.php). The bridge. It hooks Fluent Forms’fluentform_submission_insertedevent and pushes the subscriber into MailerLite over the API. This is the piece I almost deleted by mistake, and the reason is Lesson 4. - MailerLite. The destination. New subscribers land in the “Starter Kit Subscribers” group, which triggers a 3-step welcome automation: deliver the kit, teach one quick win, introduce the paid product. The automation is live and enabled.
- LiteSpeed Cache 7.8.1. The caching layer, and the antagonist of Lesson 2. Fast site, right up until it serves a stale version of the page you edited thirty seconds ago.
- Reusable Gutenberg block (ID 455), “OHQ Newsletter Signup Card.” The single source of truth for the design. The dark gradient card, the lime “OPTIMYZEHQ MONTHLY” eyebrow, the headline, and the embedded form shortcode all live here. Edit this one block and every placement updates at once.
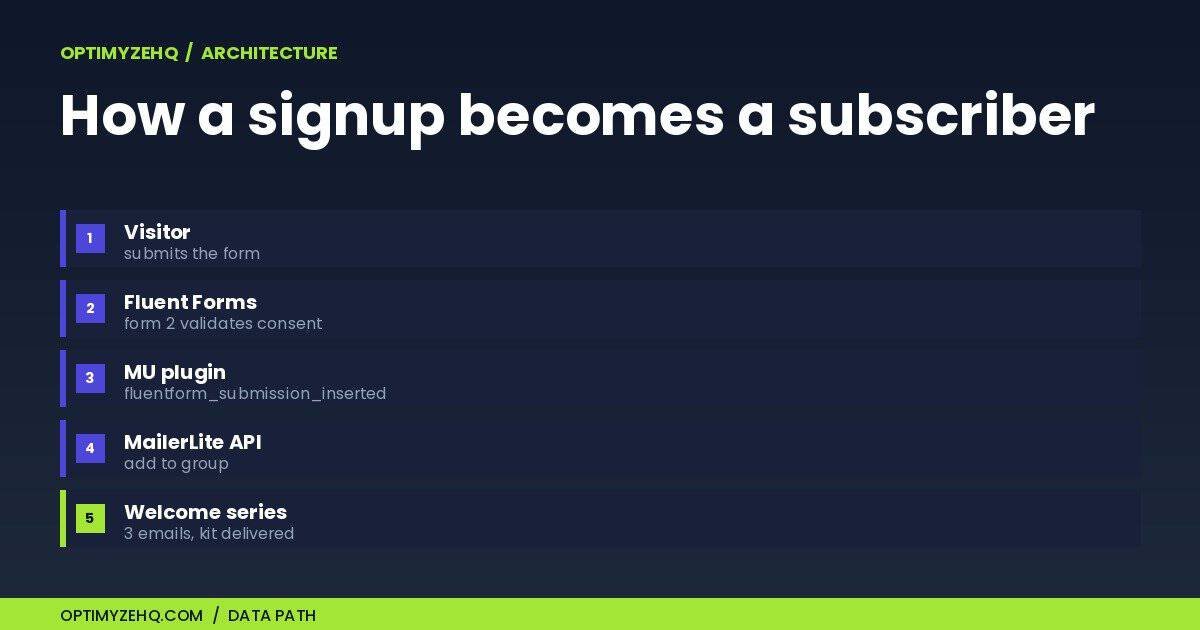
One note that matters for the rest of this post, because I got it wrong in my own build notes and only caught it when I checked the live system: the data path runs Fluent Forms to the custom MU plugin to MailerLite. I also have MailerLite’s official signup-forms plugin installed, and I assumed for a while that it was quietly catching my form submissions. It isn’t. It only handles MailerLite’s own embedded forms, not a Fluent Forms submission. The thing actually moving subscribers is my own bridge code. That mistake is the whole of Lesson 4, and it’s the most useful thing in this post.
Here’s the architecture, front door to inbox:
Lesson 1: the duplicate value attribute that silently broke consent
The first thing I built was the form. Four fields, a consent checkbox, done. I tested it. Submission failed validation every time, and Fluent Forms gave me nothing useful about why.
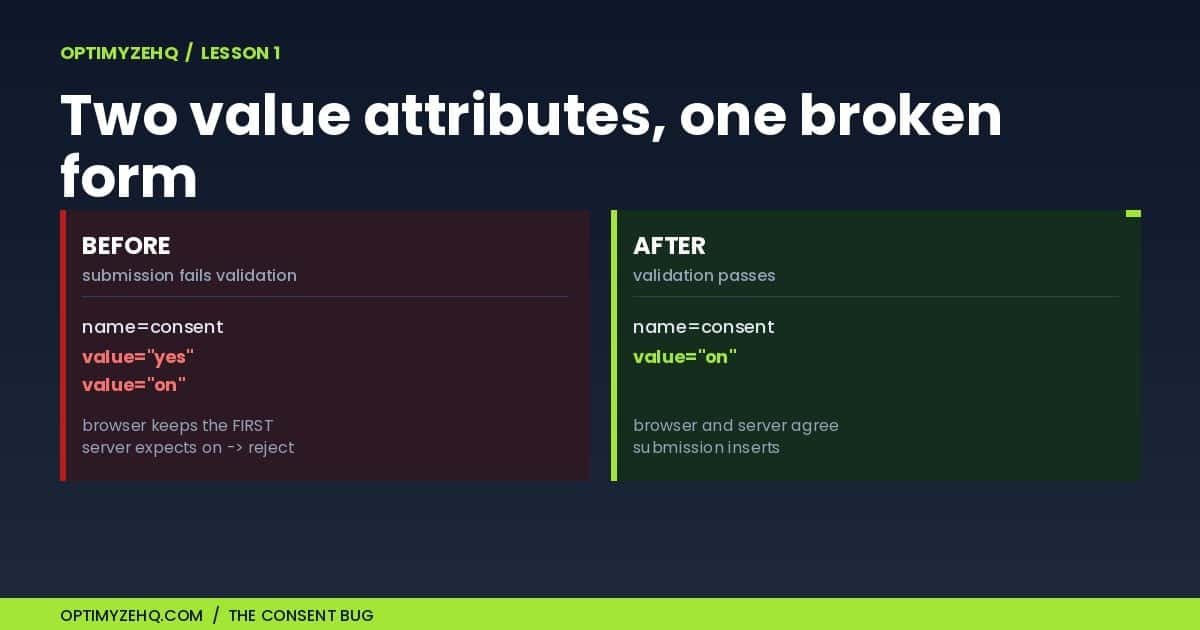
The form looked correct in the editor. So I pulled the rendered HTML of the consent checkbox and read it line by line. The checkbox input had two value attributes:
<input type="checkbox" name="consent" value="yes" value="on" required>
Two values on one element. Fluent Forms’ “terms and condition” field was writing its own default of yes, and my custom configuration was adding on. The field rendered both.
Here’s why that quietly breaks everything. When an HTML element carries the same attribute twice, the browser keeps the first one and discards the rest. So the browser submitted consent=yes. But Fluent Forms’ server-side validation for that field type expects the value on. The browser said yes, the server wanted on, the two never matched, and the submission failed the consent check before it ever reached my routing code. No subscriber, no error worth reading.
The fix was one setting. I configured the consent field’s value to on so that both the default and my override agreed:
<input type="checkbox" name="consent" value="on" required>
Now the browser submits on, validation passes, and the submission inserts. Confirmed on the live form: field consent, type terms_and_condition, value on.
The lesson that generalizes past this one field: when a form silently fails validation and the markup looks fine in the builder, read the actual rendered HTML, not the editor’s preview. The builder showed me one clean field. The browser showed me two value attributes fighting each other.
Lesson 2: the cache that wouldn’t clear
With the form fixed, I edited the signup card and reloaded. Old version. Edited again, reloaded. Old version. For a few minutes I thought my changes weren’t saving at all.
They were saving. LiteSpeed Cache was serving a cached copy of the page and ignoring the fact that the content had changed. This is the tax you pay for a fast site: the cache does its job a little too well.
My first instinct was to find a REST endpoint to purge the cache programmatically, since I do almost everything on this site over the API. There isn’t one. LiteSpeed Cache (version 7.8.1) does not expose a public REST route you can call to purge a page on demand. It exposes PHP action hooks for plugin authors, so other code running inside WordPress can trigger a purge, but nothing you can hit cleanly from an external API script.
What it does do is purge automatically when a post or page is saved. Editing a page in WordPress fires the save_post event, and LiteSpeed listens for that and clears the cached copy of that page and its related archives, which is the documented auto-purge behavior. So the workaround is to make WordPress think the page was saved, even when I’m editing through the API.
The pattern I settled on: after I change a page or a reusable block over the REST API, I send one more request that re-saves the same page with its current status. That second write fires save_post, LiteSpeed sees it, and the stale copy gets purged. No content changes on the re-save. It exists only to trigger the event.
In practice that’s a POST to the page or post endpoint with the status it already has:
# After editing content, re-save to fire save_post -> LiteSpeed purges
post(f"/wp/v2/pages/{page_id}", {"status": "publish"})
This generalizes to any LiteSpeed site you manage over the API. There is no purge button you can press remotely, but there is a save event you can fire, and the save event purges for you. Edit, then re-save the same status, and the cache catches up.
Lesson 3: the regex that ate 25,898 characters
This is the one that nearly cost me a day.
The Free AI Starter Kit page still had the old MailerLite iframe sitting inside a wp:html block. I wanted it gone so I could drop the new signup card in its place. The block was wrapped in WordPress’s standard block comments, like this:
<!-- wp:html -->
  ... old MailerLite iframe ...
<!-- /wp:html -->
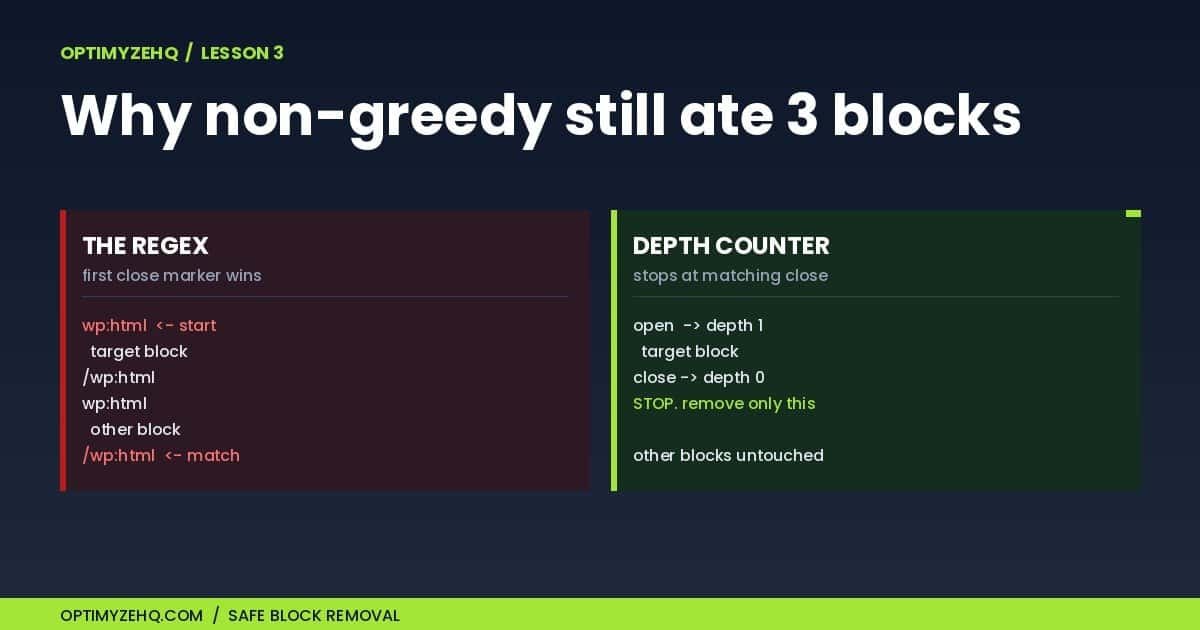
So I wrote what looked like a safe find-and-replace: match from the opening <!-- wp:html --> to the closing <!-- /wp:html --> and delete it. I even used a non-greedy match, the .*? version, because every tutorial tells you non-greedy is the careful choice. I ran it against the page content.
It deleted 25,898 characters. Three separate blocks, gone, including content that had nothing to do with the signup.
Here’s why non-greedy didn’t save me. The page had four separate wp:html blocks, not one. Non-greedy means “stop at the first closing marker you find,” which sounds exactly right. But my pattern started at the first <!-- wp:html --> and scanned forward, and because the markers repeat across four blocks, the first closing marker the engine reached belonged to a different block than the one I wanted. The match ran straight through three blocks of content before it found a close, and swallowed everything in between. Non-greedy still matched the wrong span, because “first closing marker” is the wrong target when the markers repeat.
The recovery was quick, and it’s the reason I can write this calmly. WordPress keeps page revisions. The page had a clean revision saved before I touched it (revision 404, from a week earlier), and I restored the full content from there. Two minutes. If you take one safety habit from this entire post, take this one: before you run any bulk edit against live content, confirm a revision exists. The revision is the difference between a two-minute restore and a lost afternoon.
Then I rebuilt the edit the right way. The mistake was treating a structured, nestable, repeatable block format as if it were flat text I could slice with a single regex. It isn’t. When you have repeated open and close markers, you cannot trust “first closing marker.” You have to find the closing marker that actually belongs to the opening marker you started from.
The pattern that does that is a depth counter. You walk the content from your chosen opening marker, add one every time you see an opening marker, subtract one every time you see a closing marker, and you stop at the exact point where the count returns to zero. That’s the closing marker that matches your opener, and it gives you the smallest correct span instead of the largest accidental one.
In rough terms:
# Find the block that STARTS at start_index, matched correctly.
depth = 0
i = start_index
while i < len(content):
    if content.startswith(OPEN, i):
        depth += 1
        i += len(OPEN)
    elif content.startswith(CLOSE, i):
        depth -= 1
        i += len(CLOSE)
        if depth == 0:
            end_index = i   # the closing marker that matches our opener
            break
    else:
        i += 1
# remove exactly content[start_index:end_index], nothing more
This finds the smallest enclosing block and removes only that. No greedy regex, no non-greedy regex, no guessing. A counter that knows the difference between “a closing marker” and “the closing marker.”
The broader lesson: never run a repeatable-marker regex against structured content. Gutenberg blocks, nested HTML, JSON, anything with paired open and close tokens that can repeat. The regex doesn’t understand nesting, and “non-greedy” is not a safety feature when the markers repeat. Use a parser or a depth counter, and keep a revision in your back pocket either way.
Lesson 4: how the Fluent Forms MailerLite integration actually routes subscribers
This is the one where I almost deleted the code that was doing all the work.
Late in the session, with the form fixed and subscribers landing in MailerLite, I went looking to tidy up. I have MailerLite’s official signup-forms plugin installed. I had a custom MU plugin doing the bridging. Two things that both touch MailerLite felt like one too many, so I assumed the official plugin was quietly handling my form and the MU plugin was dead weight I could retire.
I was wrong in the most useful way possible, and the only reason I caught it is that I had instrumented my own bridge.
When I built the MU plugin, I gave it a tiny status endpoint that reports whether it loaded, whether the API key is set, which forms it watches, when it last fired, and a running fire_count. Before deleting anything, I checked it. The endpoint reported fire_count: 4, a last fire timestamped to that evening, and a last result reading OK: subscriber routed to group 184598826062972665. The MU plugin wasn’t dead weight. It was the only thing routing my subscribers.
So I checked the other two suspects. The official MailerLite plugin only handles forms you build inside MailerLite and embed; it has no hook into a Fluent Forms submission, so it was never touching my form. And Fluent Forms Pro has its own native integration feeds, but form 2 had zero feeds configured. I confirmed that against the live system: the form’s integration list came back empty. Neither of the two things I assumed might be routing was routing anything. My own code was carrying the whole load.
There’s a second, quieter lesson buried in here, and it explains the first one. Remember Lesson 1, the consent value that failed validation? While that bug was live, no submission ever passed validation, so nothing ever inserted, so the bridge never fired and fire_count sat at zero. I saw a zero, I saw subscribers somehow still appearing in MailerLite from old test forms, and I drew exactly the wrong conclusion: that some other plugin was doing the job. The two bugs told a coherent, completely false story. Only the instrument, the fire_count ticking from 0 to 4 after I fixed consent, told the truth.
The lesson that outlasts this specific build: instrument your own integrations, and trust the instrument over your assumptions. A fire_count and a last-result string cost me about ten lines of code, and they saved me from deleting my own working bridge on a hunch. When you wire two systems together, give yourself a window into whether the wire is carrying current. Then you clean up based on what fired, not on what you assume fired.
If you’re copying this pattern, that’s the load-bearing advice for your Fluent Forms MailerLite integration: whatever moves your subscriber from the form to the list, make it tell you when it runs. That signal is the difference between deleting dead weight and deleting your email pipeline.
Lesson 5: CASL for Canadian solo creators
I run OptimyzeHQ from Quebec. That one fact changes how I build a signup form, because the law I answer to is not the American one most signup tutorials are written against.
The American baseline is CAN-SPAM, which is an opt-out regime. You can email people who didn’t ask, as long as you give them a way to stop. Canada’s Anti-Spam Legislation, CASL, is the opposite. It is an opt-in regime: you need consent before you send commercial email, and the burden is on you, the sender, to prove you got it. The Canadian Radio-television and Telecommunications Commission enforces it, and the penalties are not symbolic. They reach up to ten million dollars per violation for a business. The case everyone cites, a Quebec training company fined over a million dollars, is the reason Canadian operators take this seriously.
For a solo creator, three obligations matter most for every commercial email you send. You need consent, which can be express (someone actively agreed) or implied (an existing business relationship). You need to identify yourself, with a real sender name and contact information. And you need a working, no-cost unsubscribe, honored within ten business days. Express consent, once given, does not expire on its own, but the recipient can withdraw it at any time, and you have to make that easy.
So I built the form to make consent visible and explicit rather than assumed. Three layers, top to bottom:
- The button states the deal. It reads “Send me the Starter Kit,” so the value exchange is on the button itself.
- The eyebrow sets the frequency. The card’s lime “OPTIMYZEHQ MONTHLY” label tells you, before you type anything, that this is a monthly newsletter and not a daily firehose.
- The consent line is plain and present. Directly at the checkbox: “By subscribing, you agree to receive monthly emails from OptimyzeHQ. Unsubscribe anytime.” No legalese, no buried terms, no pre-checked box doing the agreeing for you.
That last point is the one I’d underline. Express consent under CASL is strongest when the person actively gives it. A box the user ticks themselves is consent. A box you pre-tick for them is consent you’ll have a hard time defending. So the checkbox on my form starts empty and the visitor checks it. It’s one extra click, and it’s the click that makes the consent real.
I am a solo founder, not a lawyer, and this is how I set up my own form, not legal advice for yours. If you sell into Canada, read the CRTC’s CASL guidance directly and, if there’s real money or real volume involved, talk to someone qualified. But the shape of it is simple enough to build in an afternoon: ask first, say who you are, say how often, and make leaving easy. My weekly-versus-monthly thinking and the automation behind this form come straight out of the system I described in my newsletter automation build, which is the natural next read after this one.
The reusable parts
Here is what you can lift directly. Four pieces: the bridge plugin, the form’s field setup, the CSS that makes Fluent Forms match a dark card, and the re-save habit.
1. The bridge (MU plugin). This is the piece that routes the subscriber. It lives in wp-content/mu-plugins/, so WordPress loads it automatically with no activation step. The shape of it: hook the submission event, read the email and consent, call the MailerLite API, record the result.
add_action('fluentform_submission_inserted', function ($entry_id, $form_data, $form) {
    if ((int) $form->id !== 2) return;          // only the newsletter form
    $email = sanitize_email($form_data['email'] ?? '');
    if (!$email) return;

    $resp = wp_remote_post('https://connect.mailerlite.com/api/subscribers', [
        'headers' => [
            'Authorization' => 'Bearer ' . MY_MAILERLITE_KEY,
            'Content-Type'  => 'application/json',
        ],
        'body' => wp_json_encode([
            'email'  => $email,
            'groups' => ['184598826062972665'],   // Starter Kit Subscribers
        ]),
        'timeout' => 15,
    ]);

    // record fire_count + last_result here so you can SEE it later (Lesson 4)
}, 20, 3);
The detail that saved me: store a fire_count and a last-result string somewhere you can read back over the API. That instrument is the whole of Lesson 4.
2. The form fields. Form 2 has four fields, and the configuration that matters is on two of them. The consent field is a “terms and condition” field with its value set to on (Lesson 1), so browser and server agree. The hidden source field captures where the signup happened.
3. The CSS that makes Fluent Forms match a dark card. Fluent Forms ships light-theme defaults. To sit inside a navy-to-slate gradient card, the input and button need overriding, and Fluent Forms’ own styles are specific enough that you need !important to win:
.ohq-signup .ff-el-input--content input[type="email"] {
    background: #0F172A !important;
    color: #fff !important;
    border: 1px solid #1E293B !important;
}
.ohq-signup .ff-btn-submit {
    background: #A3E635 !important;   /* lime */
    color: #0F172A !important;
}
4. The re-save habit. After any API edit to a page or the reusable block, fire one re-save so LiteSpeed purges (Lesson 2). One extra request, and your edits actually show up.
All four live in one reusable block (ID 455 on my site) so I edit the design once and every placement updates. That’s the payoff of Path B: one card, one place, every page.
What I’d do differently
Three things, in the order they’d have saved me the most time.
Inspect what’s already wired before writing new code. I spent real energy convincing myself a plugin was doing a job my own code was doing. Five minutes reading my integration settings and my own status endpoint at the start would have replaced an hour of wrong assumptions at the end.
Never point a repeatable-marker regex at structured content. The 25,898-character delete was avoidable. Use a depth counter or a real parser, and confirm a revision exists before any bulk edit. That habit turns disasters into two-minute restores.
Verify cache behavior on the first edit, not the fifth. If you run a caching layer, learn how it purges before you start editing, so you’re not debugging a phantom.
And one thing I haven’t fixed yet, in the spirit of building in public: my hidden source field defaults to a single placeholder instead of a per-page value, so right now I can’t tell which page a signup came from. The signup works; the attribution is v2.
The form below is the thing you read about
Everything above runs the signup at the bottom of this page. Same form, same bridge, same consent line, live right now.
If you want the system without building it, two doors. The free one: the AI Starter Kit, five Claude prompts and a Notion setup that the form below delivers to your inbox in about three minutes. I tested that timing on the live automation, so three minutes is measured, not marketing. One email a month after that, no daily firehose, unsubscribe in one click.
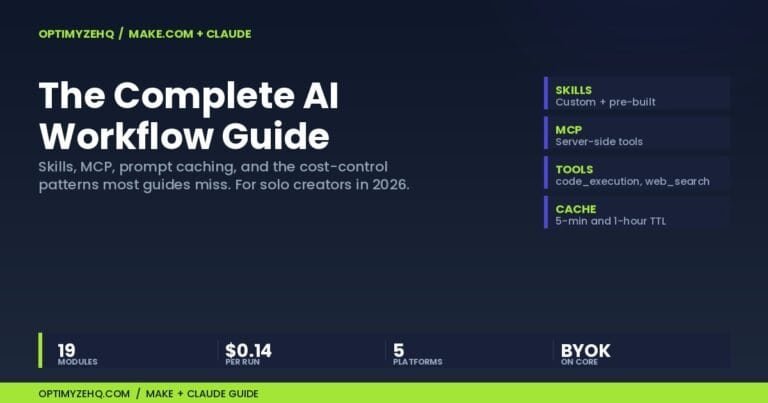
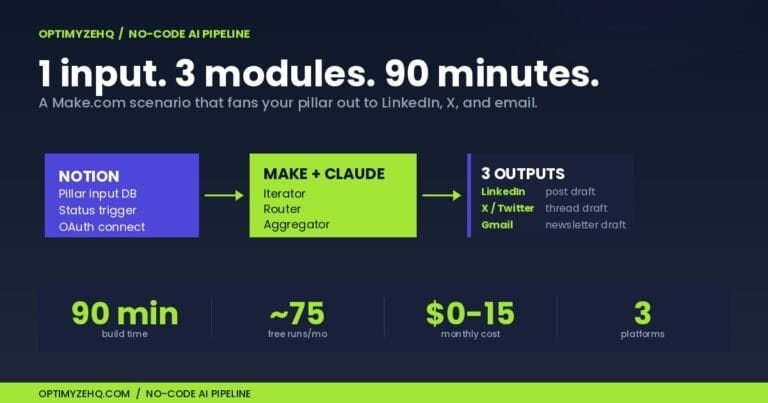
The deeper one: if you want the automated newsletter engine behind this, the build that turns a blog archive into a sending newsletter, that’s a system I’ve documented and packaged. You can read how it works in my newsletter automation breakdown, or see the productized version on the products page. And if you’re wiring Claude into your workflows more broadly, the Make and Claude guide is the place to start.
Ask first, say who you are, say how often, make leaving easy. Then go build the thing.