
Your First AI Automation: A 30-Day Plan for Non-Techies (Claude + Make)
You have watched other solopreneurs wire up tools that answer emails, sort leads, and send weekly reports while they sleep. You want that. You also do not write code, and every tutorial seems to assume you already know what a “webhook” is. This is the plan I give to someone building your first ai automation from a standing start: 30 days, one real win on the first day, and no API key until you actually need one.
It is a plan, not a challenge. Nothing to keep up with, nothing to fall behind on. You keep every automation you build, and you can stop at the end of any week with something that works.
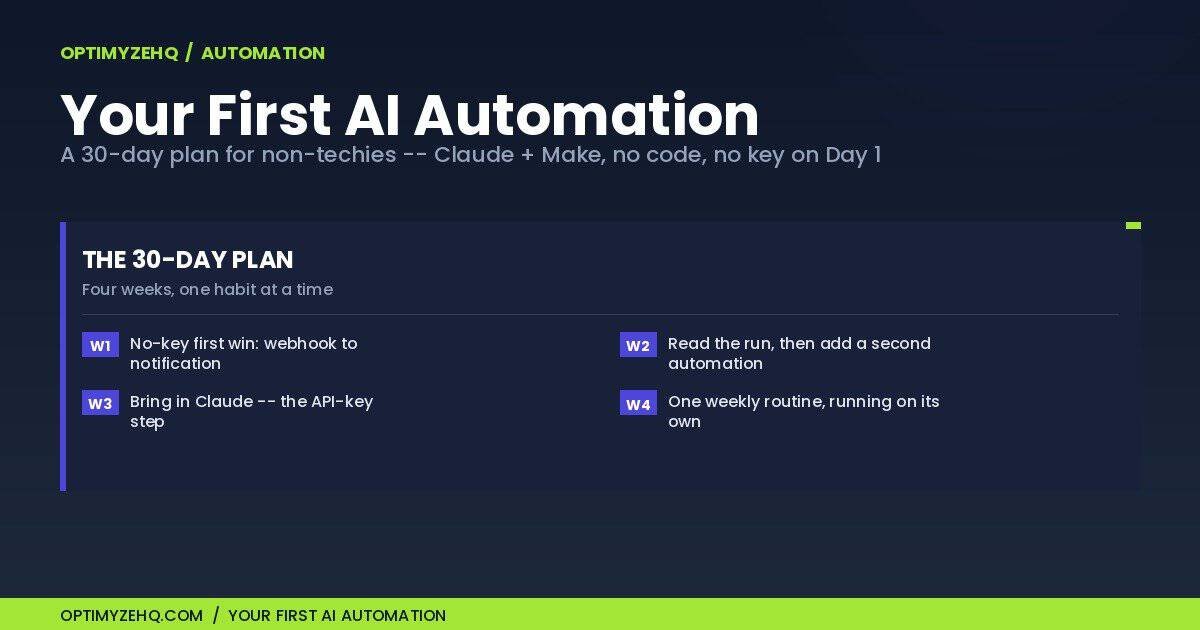
Here is the shape of the month:
| Week | Days | What you build | Paid plan or key? |
|---|---|---|---|
| Week 1 | 1–7 | The no-key first win: a contact form that fires an instant notification | No — free plan, no key |
| Week 2 | 8–14 | Read your runs, then add a second webhook scenario | No — free plan, no key |
| Week 3 | 15–21 | Bring in Claude: a content-idea digest on a schedule | Yes — Make Core + a Claude API key |
| Week 4 | 22–30 | A weekly business-review email built from a Notion table | Yes — Make Core + a Claude API key |
By day 30 you will have two or three small automations running, and a clear sense of which next one is worth building.
What “your first ai automation” actually means
An automation is a short chain of steps that runs without you sitting there. In Make, the no-code tool this plan uses, one chain is called a scenario, and each step inside it is a module. Every scenario needs a trigger: the event that sets it off.
Triggers come in two kinds, and the difference shapes both speed and cost:
- A polling trigger checks a service on a timer (“any new form entries yet?”) every few minutes, whether or not anything has happened.
- A webhook sits quiet and fires the instant something is sent to it.
That second kind is the quiet hero of this whole plan, and it is why your first build needs no paid plan and no key. Hold that thought.
You will meet Claude, an AI model from Anthropic, in Week 3. For now, know one thing that trips up almost everyone: a Claude Pro subscription and the Claude API are two different products. More on that when it matters.
What you need before Day 1 (the honest setup)
Three free accounts, and nothing you pay for yet:
- A free Make account. The free tier gives you 1,000 credits a month, up to two scenarios switched on at once, and a fifteen-minute floor on how often a scheduled scenario can run. A credit is roughly one action inside a scenario. For a beginner running a handful of automations, 1,000 is a generous ceiling.
- A free Notion workspace. You will use it in Week 4 as the place your data lives. The free plan for one person carries unlimited pages, which is plenty here.
- A Claude account, on the free or Pro tier. You do not need this until Week 3, and even then there is a catch worth naming early.
Two more things Week 1 assumes, so line them up now. First, a form that can send submissions to a web address (a webhook): most website builders and form plugins can do this, and if you do not have one yet, a free form builder like Tally sends submissions to a webhook on its free plan, which covers the day-one build. Second, somewhere for the notification to land, the email account or chat app you will connect inside Make. Neither costs anything; they are the pieces your first automation plugs into.
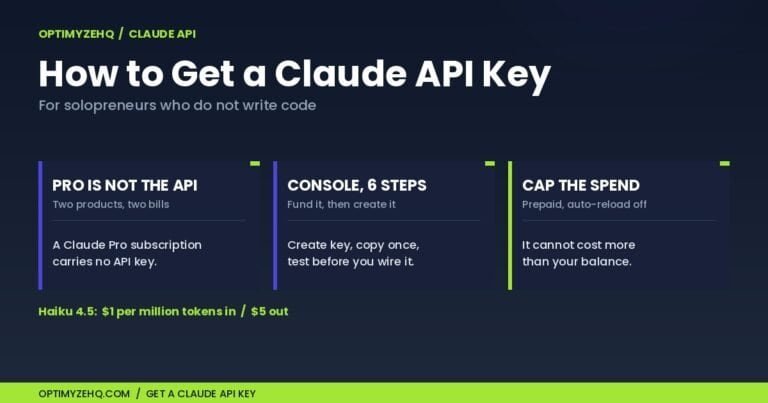
Here is that catch. Claude Pro is not the Claude API. Pro (around $20 a month) gives you the chat app in your browser. The API is a separate, separately funded service that tools like Make connect to with a key. Paying for Pro does not hand Make anything. This point trips up a lot of beginners, so I am flagging it now and will come back to it in Week 3.
Notice what is not on this list: a paid Make plan, an API key, or a credit card. You will add exactly one paid piece, once, in Week 3, and only if you choose to keep going.
The framework: the no-key first win
The reason most people never build your first ai automation is that they try to start with the impressive version, hit an API key or a billing screen on day one, and quit. So we invert it.
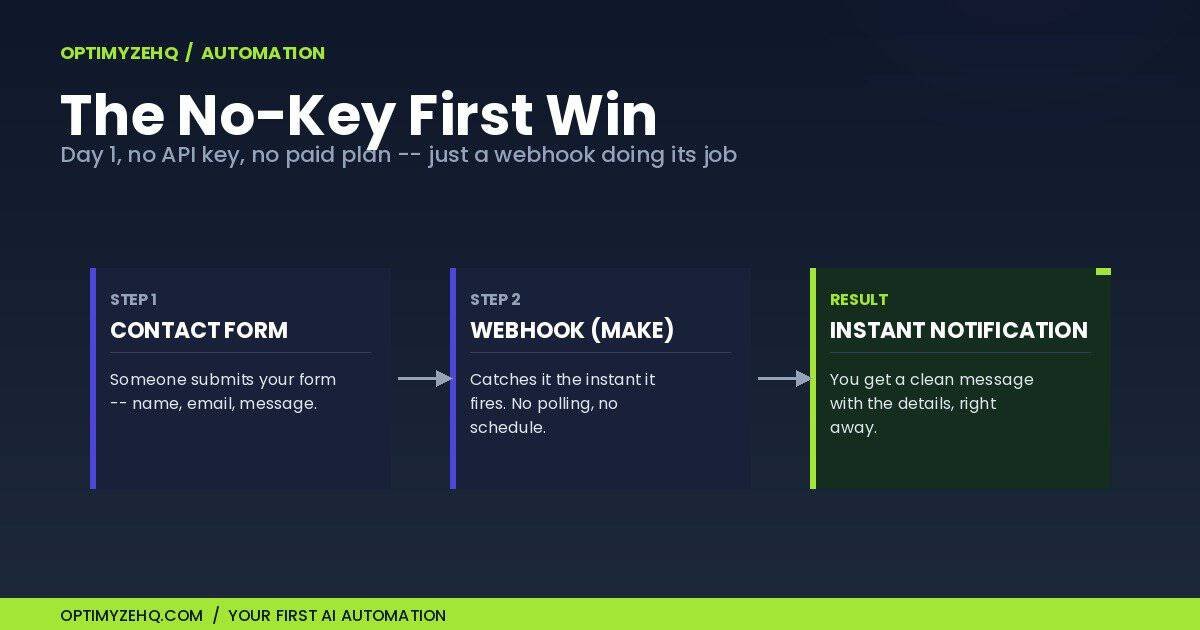
The no-key first win is the core idea of this plan: on the first day, you build an automation that needs no AI, no API key, and no paid plan, and you watch it fire in real time. It works because of the webhook you read about earlier. A webhook has its own address. Anything that can send to that address, a contact form on your site, for example, can start your scenario the moment it happens, with no polling, no schedule, and no per-check cost.
Getting one real thing to run on day one changes how the rest of the month feels. You stop treating automation as a distant, technical thing and start treating it as something you already do.
Week 1 (Days 1–7): the no-key first win
Your first build is a contact-form-to-notification automation. When someone fills out a form, you get a clean, instant message with their details, without watching your inbox.
Build it in this order:
- In Make, create a new scenario and add a Webhook module as the trigger. Make gives you a unique address. Copy it.
- Paste that address into your form tool’s “send a copy to this URL” setting (most form plugins and builders have one).
- Submit a test entry. Make reads it and lists the fields it found (name, email, message), so you can use them in the next step.
- Add a second module that sends you the message: an email to yourself, or a note in your chat tool of choice. The first time, Make will ask you to sign in to that account so it can send on your behalf.
- Map the form fields into that message (mapping means clicking a field, like the visitor’s email, to drop it into the text), turn the scenario on, and submit one more real test.
That is a working automation. No key, no paid plan, no schedule burning credits in the background, because the webhook only runs when a form actually comes in. Sit with it for a day before moving on. Watching it fire on a real submission is the point of Week 1, not speed.
Week 2 (Days 8–14): read your automation, then add a second
A working automation you cannot read is a black box, so Week 2 is about seeing inside it.
Open your scenario’s history. Each run shows what came in, what each module did, and how many credits it spent. Spend twenty minutes here across the week. Learning to read a run is the skill that lets you fix the next automation yourself instead of starting over.
Build one reliability habit now: if a scenario keeps failing, Make switches it off and emails you. Confirm those emails reach you (check your notification settings in Make, under Profile then Email preferences), and if the notifications go quiet, glance at the scenario’s history. A stopped automation you never noticed is the failure mode to watch for once it is handling real leads.
Then add a second scenario, within the free tier’s two-at-once limit. Keep it simple and keep it webhook-triggered so it stays free to run: a new-subscriber form that drops a row somewhere, or a second form on a different page routed to a different message. The goal is repetition, not ambition.
If you want a deeper tour of Make’s interface, its modules, filters, and the finer settings, that is exactly what the Make.com for beginners guide is for. This plan stays focused on the sequence, so lean on that piece for the mechanics and come back here for the pacing. If you want ideas for what to build once you are comfortable, the five automations to build first piece is a good shortlist.
Week 3 (Days 15–21): bring in Claude (the API-key step)
Now the automations start to think, and this is where the single paid piece enters.
To let Make send text to Claude and get a reply, you connect a Claude API key. Two things to line up first:
- The key is separate from Claude Pro. As flagged in the setup, a Pro subscription does not include API access. You create an API key in the Anthropic console and fund it separately, on its own usage-based billing. It is a different tap.
- The custom Claude connection needs a paid Make plan. Make’s own Anthropic connection, the one that uses your key, sits on the Core tier, which runs about $9 a month billed annually (roughly $10.59 month to month). This is the one paid piece of the whole plan, and you add it only if you want the AI-powered automations. The no-key automations from Weeks 1 and 2 keep working without it.
With that understood, build it in this order:
- In the Anthropic Console, create an API key. Add billing on the Console’s billing page by buying a small amount of prepaid credits, and leave auto-reload off. Your maximum spend is then capped at the credit you bought, so a mistake or a runaway scenario cannot bill you beyond it.
- In Make, add the Anthropic connection (this is the part that needs the Core tier) and paste your key.
- Build the scenario: give Claude a clear standing prompt (for example, “suggest five content ideas for a solo consultant this week”), or point it at a short list of notes you keep in a Notion field so each run has fresh input, then have it email you the ideas. A scheduled run with no fresh input will keep producing similar lists, so decide where the input comes from before you turn it on.
- Run it once by hand and read the output before you schedule it. The digest is a draft for your own eyes, not sent to anyone else, so you stay the check on quality.
- Set the schedule yourself, daily or weekly. Do not leave it on the default, which runs far more often and would call the paid API every time.
This is your first automation that produces something new rather than moving data around.
Week 4 (Days 22–30): put it together
The last week turns your parts into a routine.
Build a weekly business-review email in this order:
- Keep a small Notion table of the numbers you care about (leads, sales, tasks, whatever you actually track).
- Build a scenario that reads the table, asks Claude to summarize where things stand in plain language, and emails you the review. The first time, Make will ask you to connect your Notion account; approve it when prompted. The table’s contents are sent to the Claude API to be summarized, which is normal for this kind of workflow; keep anything you would not want leaving your own accounts out of the table.
- Run it once and read the summary before you schedule it, then set it to run weekly. As in Week 3, set the schedule yourself rather than leaving the default.
You update the table through the week; every Monday a short brief lands in your inbox on its own.
By day 30 you have a webhook automation that needs no key, an idea generator, and a weekly review, three automations, two of them AI-powered, built by someone who does not write code.
What this actually costs
Straight numbers, because guessing at cost is its own reason people never start:
- Make free tier: $0. Weeks 1 and 2 live here.
- Make Core: about $9 a month billed annually (around $10.59 monthly), and only from Week 3 onward, only if you add the Claude key. Skip the AI parts and you skip this.
- Claude API usage: billed by the tokens (the small chunks of text a model reads and writes) you send and receive, at published rates. The affordable model, Haiku, runs at $1 per million input tokens and $5 per million output tokens at its stable price. A beginner’s light month of digests and reviews moves a small fraction of a million tokens, so the realistic API cost for this plan is on the order of a dollar or two for the month, not a subscription-sized bill. (Exact figures move, so treat any number here as a dated snapshot and check current pricing before you rely on it.)
- Notion free plan: $0.
Put together: your first month can cost nothing at all if you stop after Week 2, or roughly ten to twelve dollars if you add Make Core and a little Claude usage. That is the honest range.
Common beginner mistakes (and the safe defaults)
- Using a polling trigger where a webhook would do. Polling checks on a timer and can spend a credit on every empty check; a webhook fires only on a real event. Default to a webhook whenever the source can send to one.
- Trying to run more than two scenarios on the free tier. The free plan caps you at two switched on at once. Turn one off before you turn a third on, or move up a tier when you outgrow it. Make Core, the tier you add in Week 3, runs unlimited active scenarios, so once you are on it the two-at-once cap is no longer a concern.
- Leaving a public webhook wide open. A webhook address can be reached by anyone who has it, so form spam or a leaked address can fire notifications and spend credits. Add a filter right after the webhook, for example requiring the email field to be present, and keep the address private.
- Expecting Claude Pro to cover the API. It does not. Budget for a separate, small API spend if you want the AI automations.
- Building the impressive version first. The no-key first win exists so you finish something on day one. Resist starting with the weekly review; earn it by Week 4.
None of these are permanent traps. Each has a plain default that keeps you moving.
Where this goes next
The plan above is yours, free, in full. Work it at your own pace and you will end the month with real automations running.
If you would rather skip the setup and follow a version that is already wired, that is what the AI-Curious Starter does: the 30-day sequence as a guided Notion program, 21 on-ramp prompts, and the three automations from this plan as blueprints you import in a few clicks instead of building by hand. It is $19, one time, yours to keep, with no subscription.
For now, the free Starter Kit is the fastest way to keep going. And when you are ready to go deeper on the tools, the Make and Claude workflow guide and the Claude for solopreneurs playbook sit one level up from this plan. For the broader picture of running a one-person business this way, start from the AI workflows for solopreneurs pillar.
FAQ
Do I need to know how to code?
No. Every step in this plan is built in Make, a no-code tool where you connect visual modules instead of writing scripts. The closest you get to anything technical is pasting a webhook address and mapping form fields, both of which are point-and-click.
Do I need a paid Claude plan or an API key to start?
Not to start. Weeks 1 and 2 use no AI at all, so you can build your first automations with free accounts and no key. Claude, the API key, and the one paid Make tier only enter in Week 3, and only if you choose to add the AI-powered automations.
How much does this actually cost?
It can be $0 if you stop after Week 2. If you add the AI parts, expect roughly $9 a month for Make Core (billed annually) plus a small amount of Claude API usage, often around a dollar or two for a light beginner month. Prices change, so confirm current rates before you commit.
Is the free Make plan really enough?
For this plan, yes, for the most part. The free tier’s 1,000 monthly credits and two active scenarios comfortably cover the Week 1 and Week 2 builds, especially because webhook triggers only run on real events. You would move up a tier when you want more than two scenarios on at once or start running heavier volumes.
Can a non-techie really finish this in 30 days?
For most people following it at a steady pace, yes. The plan is built so the hardest day is day one, and that day is a no-key win designed to take well under an hour. Each week after that adds one idea at a time rather than a pile at once.